And that's what this post is about. I found a picture of Red Velvet Cheesecake Brownies. I, myself, am not a red velvet fan. I always think it looks lovely, but I also always feel disappointed with the flavor. Then again, I've only had storebought versions. Until now.
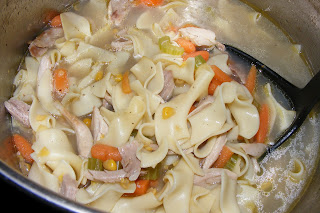
My hubby is a red velvet lover. Therefore, I thought it would be nice to make these for Valentine's Day to accompany my dinner of filet mignon. Well, hubs came down with a virus, so his request changed from red meat to chicken noodle soup. So, while my homemade soup simmered on the stove, I started on my brownies.
 |
| Homemade chicken noodle soup! Recipe soon! |
Red Velvet Cheesecake Brownies
1/2 c. butter
2 oz. dark chocolate, coarsely chopped
1 c. sugar
2 lg. eggs
1 tsp. vanilla extract
1 1/2 tsp. red food coloring
2/3 c. all purpose flour
1/4 tsp. salt
8 oz. cream cheese, room temp.
1/3 c. sugar
1 lg. egg
1/2 tsp. vanilla extract
Now, a few notes. In general, when it comes to chocolate, you get what you pay for. I would normally choose a higher quality chocolate for baking. However, hubby was at the grocery store and picked up Hershey's Dark chocolate. It worked just fine. When it comes to vanilla, never use imitation. Spend the extra money on the real stuff. I buy whatever generic brand is at the store I'm at when I need to pick it up.
Preheat your oven to 350 degrees F. Line an 8- or 9-inch square baking pan with aluminum foil and lightly grease. (I did not do this. I had confidence that my trusty Paula Deen pan would release just fine. I was wrong. It happens from time to time. My brownies stuck a little bit, but were still delicious.)
In a small, heatproof bowl, melt butter and chocolate together. I did this in a few 10 second bursts. Stir with a fork until very smooth. Make sure you scrape the bottom well. Set aside to cool for a few minutes.
In a large bowl, whisk together 1 cup sugar, 2 large eggs, 1 tsp. vanilla extract, and 1 1/2 tsp. red food coloring.
 |
| It's almost glowing! |
Add in the chocolte mixture and stir until smooth.
 |
| See how much darker it gets? |
Batter should be red. If you think your batter isn't rouge enough, add an additional 1/2 tsp. food coloring. Guilty. Add flour and salt and stir until everything is just combined. You don't want to see any streaks of flour.
I learned an important lesson while making this recipe, and I'm going to share it with you. If you don't measure all of your ingredients out before starting the recipe, DON'T talk on the phone while baking! I was on the phone with my mom and instead of adding 2/3 cup of flour, I add a whole cup! I forgot to take a picture, but needless to say, my batter was ruined and I had to start over. I ended up having just enough sugar to finish the recipe, as you can see:
So, after I remade my batter, I poured it into my (un)prepared pan and spread it into an even layer.
Next, you need to prepare the cream cheese mixture. In a medium bowl, beat the cream cheese, 1/3 cup sugar, large egg, and 1/2 tsp. vanilla extract until smooth.
Once the mixture is smooth (and, if you're me, you've taste-tested), drop in dollops on the brownie batter and swirl the two together with a knife.
Bake for 35-40 minutes, until both the brownies and cheesecake are set and the edges are lightly browned. Test for doneness by inserting a toothpick or knife into the center of the brownies. If it comes out clean, you're good! Next is the hardest part... waiting for them to cool! When that finally happens (it will seem like hours, but it's really not), slice and serve! These are yummy at room temperature (which hubby prefers) or chilled (which I prefer. Go figure.)
These will keep for several days in the refrigerator, but I doubt they'll last that long! I was pleasantly surprised by their flavor. The brownies had a delicious chocolate taste, not that food coloring taste that I associate with store-bought versions. The cream cheese was rich but not too sweet. Confession: I think I ate more that my hubby did!
Try these! They are so easy to make, and super delicious!


So far, I am totally enjoying your blog, even though I have no desire to be a domestic anything LOL. Although I would like a clean and organized apartment (or house) someday with beautiful art-gallery style paintings; but the cooking and the children, I'm just not ready for all of that. But I do love reading about my neice and nephew and your cooking excursions.
ReplyDelete